How Could Something Seemingly So Simple Get So Complicated?
Words: Steven Fechino
Words and Photos: Steven Fechino
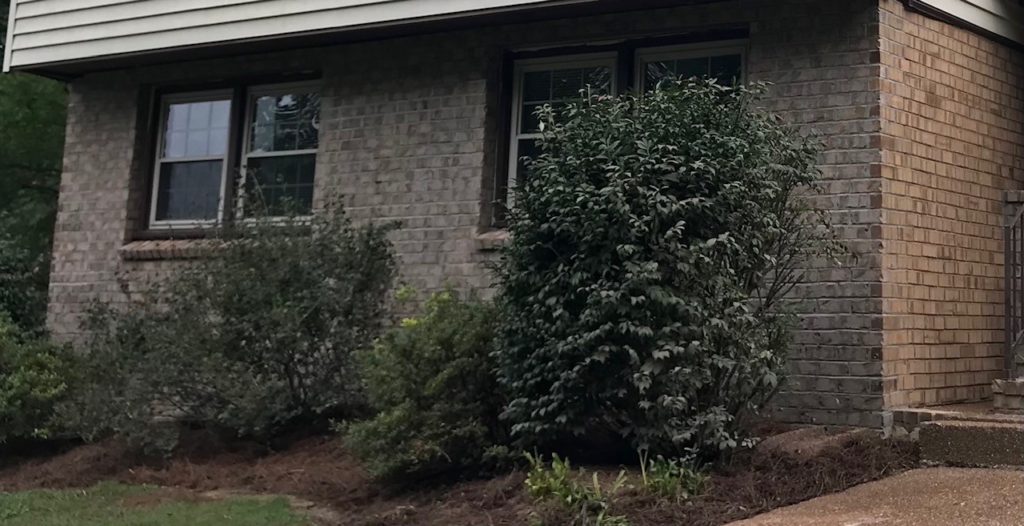
Ok, I guess all of the masonry brains that read this will comment on this one. If you have been in the field, then you already have had all of these problems. Something simple, a brick veneer wall with queen brick that gets tied into a veneer that meets the front wall on both sides. Here was my plan, ok (as Jerry Painter always says): measure length, measure width, estimate where the footing is, and boom, you have your project ready for brick.
Oh, sorry, forgot to tell you that the brick is 44 years old, and they no longer make it. Oh, and that the windows that are side by side are 1-1/4 inch off at the sill from the leftmost side to the right side. Oh, and that the brick veneer on the left is 28 courses, and the veneer on the right is 27 courses, higher on the left than the right, but the grade dropped right to left. Oh, snap, I also forgot to tell you that the bed joints of the veneers on the left and right are about 1-1/2 to 1-1/4-inches off from side to side.
So, the first thing I did was pick out a brick that had a close color to what I had to match. In my case, the mortar was not a great contrast different from the brick, so adjustments were hardly noticeable. The texture of the newly chosen brick was completely different from my existing brick (this was helpful). The new brick was king rough, so it would hide minor corrections that I needed to make in the veneer.
I then decided to tooth out both sides and really get a look at what I was up against; if I could make up a little on the left and right veneer as I turned the corner, I would take that as a win. I was able to almost make up 1/8-inch as I turned the toothed corner. The overall result was that I had to make up a 1-1/8-inch average in 28 linear feet. To make this easier math to see, take 28 ft. and divide it by 4 (the length of a 4-foot level) = 7. The reason I used the distance of the level is because once you start laying, the "bubble stick" will be your gauge for how well you are hitting your lines. Using the calculator one final time, 0.94 inches / 7 (length of the wall divided by the length of the "bubble stick" that will be used) = 0.13 ft or approximately 1/8-inch in a four-foot level on the wall. This was an easy way to get to where I needed to be without too much thinking. Since I am not the best at laying brick, well, 1/8-inch was good to work with.
Now, I really could not use corner poles, so the lead had to be built by pulling the existing brick to the corner and changing the brick (to the brick that sort of matched existing) as it turned to the front wall. This was actually an easy transition and easy work in the summer heat. I was able to lose even a little more bed joint as I turned the corner, but I had to step back every brick to make sure. This was a helpful step.
I was unable to make up the hog in the wall between the windows because when I topped out, I would still have the same dimension difference since I was matching two outside walls with a center infill.

Before I got to the base of the windows, I measured to see if I could hit both window heads with the correction, but not a chance. I was able to hit three corners of the two windows, but one corner (7-feet window heads) was not going to work, trimming the brick mold would have really been noticeable- it was about two feet from the outside corner and under a 24- inch overhang. I did what anyone in my situation would do; I drank a cold bottle of water, re-convinced myself that it was just not that hot outside, changed the playlist, and got back to work. I did what and only what I could do, put in a rip. Man, if you know me, you know this about hurt me; I worried about this, then a few days later, when the mortar dried and matched, you could barely see it. I realized it was just fine; nobody will know… and unless you tell someone, it is between us.
To do my rowlock sills, I ended up needing to lay another course on the left window, and I had to saw cut to the same height as on the right. Again, easy to do, except the saw got heavier since I used it last, kinda like me, just gaining weight.
The project was good for me to do as someone who does not lay every day; it brought me back to reality. The purpose for me writing this is simple, I looked at drawings every day for years, and sure, I knew a few things about building walls, but it is our people that make all of these decisions every day, keeping projects going, architects looking good, and the pay requests paid. Please, we all know how hard our people work, and sometimes we complain about them, but sometimes they outthink all of us keeping a job running smoothly.